
Over time, shower grout can become stained, cracked, discolored, or difficult to clean. Fortunately, replacing damaged grout doesn’t usually mean removing the existing tiles. Learning how to regrout a shower without removing tiles can help refresh the appearance of the shower while improving the condition of the grout joints.
The key is to remove enough of the damaged grout before applying the new material.
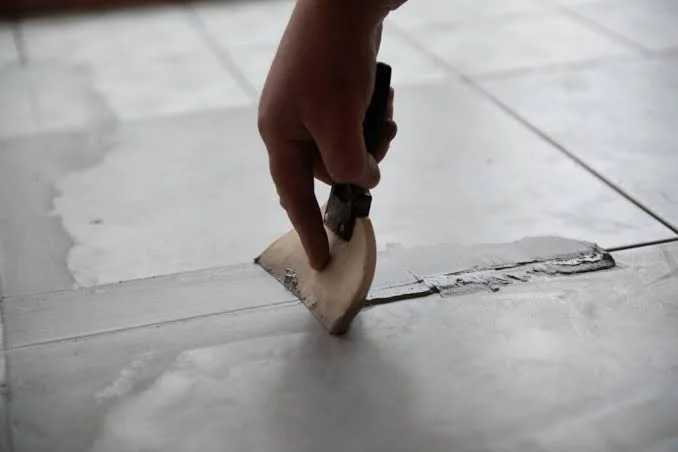
Can You Put New Grout Over Old Grout?
In some situations, homeowners wonder whether they can simply apply new grout over old grout. This usually isn’t the best approach when the existing grout is cracked, loose, or deteriorated.
New grout needs enough depth and a clean surface to bond properly. Applying a thin layer directly over deteriorated grout can lead to cracking, poor adhesion, and premature failure.
For a lasting shower grout replacement, removing the damaged surface first is generally the better approach.
Step 1: Inspect the Existing Grout
Start by examining the shower carefully.
Look for:
- Cracked grout
- Missing grout
- Loose sections
- Mold or mildew
- Deep discoloration
- Areas where grout has separated from the tile
If the tiles themselves are loose or there are signs of water damage behind the shower, regrouting alone may not solve the underlying problem.
Step 2: Gather the Right Tools
You don’t need complicated equipment for every regrouting project.
Useful tools include:
- Grout saw
- Oscillating multi-tool
- Utility knife
- Vacuum
- Grout float
- Sponge
- Mixing bucket
- Soft cleaning brush
A manual grout saw can work well for small areas. An oscillating tool with an appropriate grout-removal blade can make larger projects faster, but it requires careful handling around the tile edges.
Step 3: Remove the Damaged Grout
Carefully work along the existing grout lines with a grout saw or other appropriate removal tool.
The goal isn’t to damage the tile. Instead, remove enough old material to create a clean, stable joint for the replacement grout.
An oscillating multi-tool can help remove stubborn grout, but work slowly and avoid forcing the blade against the tile.
After removing the old material, vacuum the joints thoroughly to remove loose dust and debris.
Step 4: Clean the Tile and Grout Joints
Before installing new grout, the joints need to be clean and free from loose particles.
Wipe the surrounding tile with a damp sponge and allow the area to dry according to the grout manufacturer’s instructions.
If there is remaining surface residue after grouting, a suitable grout haze remover can be used once the grout has properly cured.
Step 5: Choose the Right Grout
Selecting the correct grout depends on the size of the joints, shower location, and manufacturer’s recommendations.
Two common options are:
Sanded Grout
Sanded grout is generally used for wider joints and provides good durability for appropriate applications.
Unsanded Grout
Unsanded grout is commonly used for narrower joints and areas where a smoother finish is preferred.
Products from manufacturers such as Mapei and Laticrete offer different grout formulations for various tile and wet-area applications. Always follow the specific product instructions rather than choosing grout solely based on appearance.
Step 6: Match the Existing Grout Color
If you’re regrouting only part of the shower, choosing a compatible grout color match can make the repair less noticeable.
However, even the same grout color can look slightly different because of age, cleaning products, moisture exposure, and curing conditions.
For this reason, replacing grout across an entire section may produce a more consistent appearance than repairing isolated joints.
Step 7: Apply the New Grout
Mix the grout according to the manufacturer’s instructions.
Using a grout float, press the material firmly into the joints at an angle. Work across small sections rather than attempting the entire shower at once.
Remove excess grout from the tile surface with the edge of the float.
Good grouting technique is important because poorly packed joints can leave weak areas that may crack later.
Step 8: Clean the Tile Surface
Once the grout begins to set, carefully wipe the tile surface with a damp sponge.
Avoid using excessive water because it can affect the grout during curing.
Rinse the sponge frequently and use light passes to remove grout residue without pulling material out of the joints.
A light haze may remain after the surface dries. This can generally be addressed with an appropriate grout haze remover after the grout has cured according to the manufacturer’s instructions.
Step 9: Apply Grout Sealer
Depending on the grout product, sealing may be recommended after curing.
A grout sealer application can help reduce moisture and staining on appropriate cement-based grout.
Follow the manufacturer’s instructions regarding:
- Curing time
- Sealer type
- Number of coats
- Application method
- Shower use after sealing
Not every grout requires the same sealing process, so always check the product specifications.
When Regrouting Isn’t Enough
Regrouting can improve the appearance and condition of a shower, but it isn’t a solution for every bathroom problem.
Consider professional assessment if you notice:
- Loose shower tiles
- Repeated grout cracking
- Persistent moisture
- Water stains outside the shower
- Soft wall materials
- Failed waterproofing
- Damaged shower pan
These symptoms may indicate an issue behind the tile rather than simply worn grout.
How to Keep Shower Grout Looking Better
Regular bathroom tile maintenance can extend the life of your new grout.
Simple habits include:
- Keep shower surfaces clean.
- Improve bathroom ventilation.
- Repair cracked grout promptly.
- Replace deteriorated silicone.
- Avoid harsh cleaning products.
- Follow the grout manufacturer’s maintenance recommendations.
Regular inspection makes it easier to identify small problems before they become larger renovation issues.
Final Thoughts
Learning how to regrout a shower without removing tiles can be a practical way to refresh an aging bathroom. By carefully removing damaged grout, cleaning the joints, selecting the appropriate replacement grout, and applying it correctly, homeowners can improve both the appearance and condition of their shower.
However, if grout problems continue to return or there are signs of moisture behind the tile, the issue may require more than surface maintenance. In those situations, inspecting the underlying shower construction before continuing with cosmetic repairs is the safer approach.